
TM 10-4500-200-13
Caution: Be careful not to enlarge the holes in
the burner pot.
a. Removal.
(1) Remove the air conditioning pipe (para 2-26).
(3) Inspect burner pot for excessive accumulation of
(2) Remove the space heater top (para 2-32).
soot .
(3) Remove either the grate (para 2-33) or the oil-pot
(4) Inspect burner pot metal for excessive warping,
burner (para 2-34).
cracks, and broken spot welds. Replace a defective burner
(4) Refer to figure 2-5 and remove the space heater
pot.
base.
c. Installation.
b. Inspection.
(1) Refer to figure 2-5 and install the oil-pot burner in
Inspect the heater base for cracks, holes, and dis-
the heater body.
tortion. Inspect ash door for proper alignment and latch for
(2) Install the float valve on the oil-pot burner (para
security.
c. Installation
(3) Install the space heater top on the heater body
(1) Refer to figure 2-5 and install the heater base.
(2) Install either the grate (para 2-33) or the oil-pot
(4) Install the air conditioning pipe on the space
heater top (para 2-26).
burner (para 2-34).
(3) Install the space heater top (para 2-32).
(4) Install the air conditioning pipe on the heater top
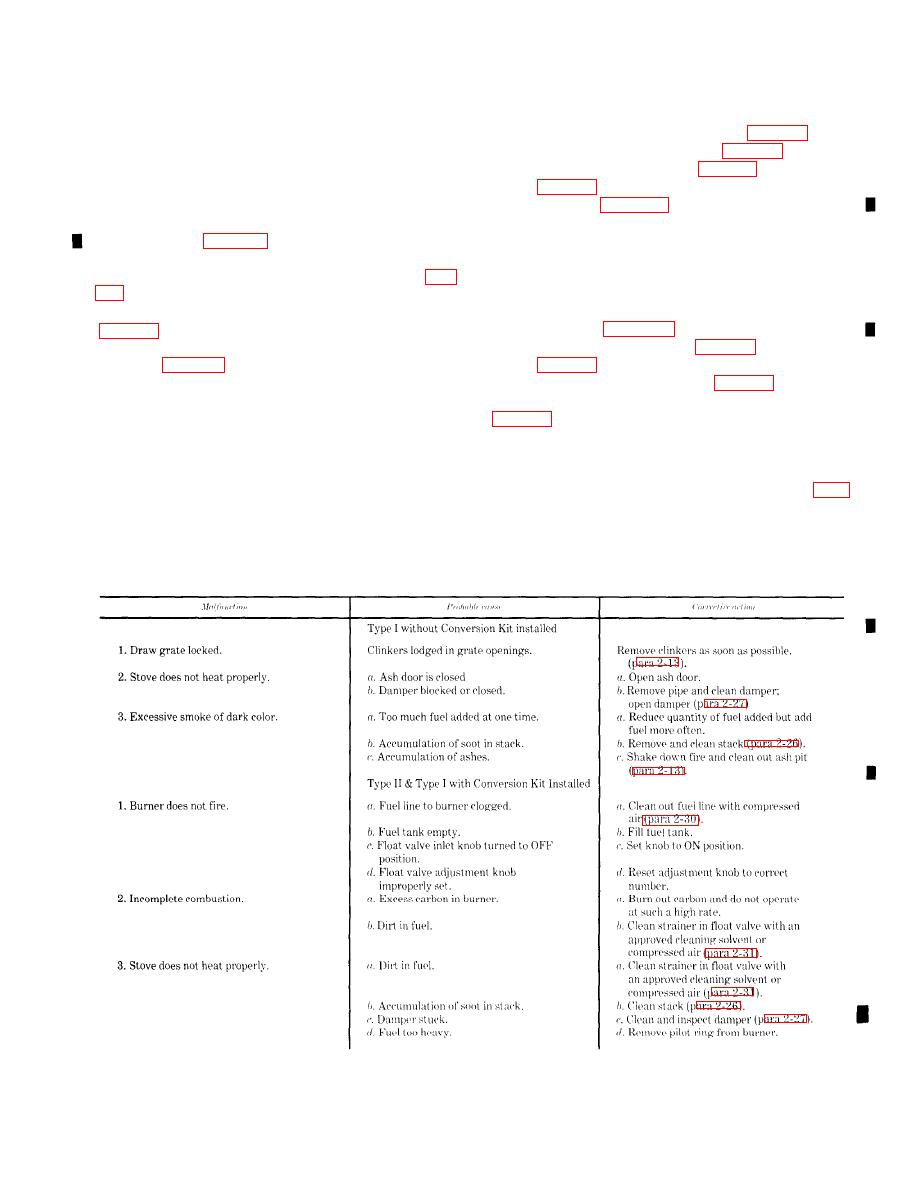
Section X. TROUBLESHOOTING
heater. Malfunctions which may occur are listed in table
2 - 3 6 . General
2-2. Each malfunction stated is followed by a list of proba-
ble causes of trouble. The corrective action recommended is
This section provides information useful in diagnosing and
described opposite the probable cause.
correcting unsatisfactory operation or failure of the space
Table 2-2. Troubleshooting
Change 14

