
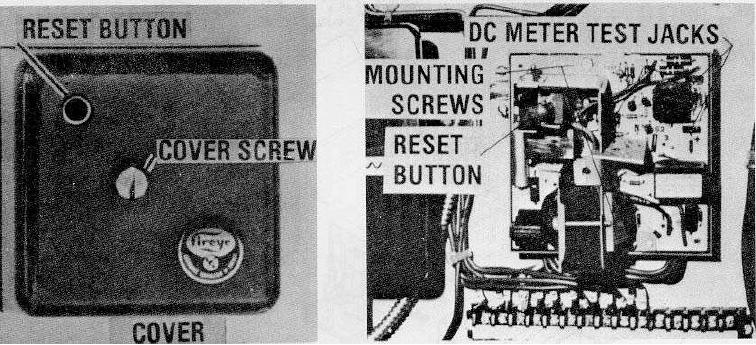
Figure 29. FLAME PROGRAM CONTROLLER
3.
The temperature control should be set to within plus or minus of 15 of that shown on the test thermometer.
4.
If the temperature control does not respond as above, replace the capillary tube and bulb.
5.
It is possible to calibrate the control using a small wrench. This calibration should not be made unless the
capillary tube and bulb has first been checked as outlined In one (1) through three (3) above.
6
Following replacement of the capillary tube and bulb, perform steps one (1) through three
(3) above. If the temperature controller does not respond as indicated in three (3) above,
the controller is defective and should be replaced.
7.
Following the test, stop the hot oil heater (Para. 13).
8.
Remove the test thermometer and reinstall the regular thermometer in the line.
NOTE: TO CALIBRATE TEMPERATURE CONTROL, REFERENCE FIG. 30 AND PROCEED AS FOLLOWS:
1.
Move setting point tip to temperature indicated by test thermometer, Item 9.
2.
Remove cover screws, knob, and cover, Items 2, 3 & 1.
3.
Loosen push rod set screw, Item 6.
4.
Using 3/16" wrench, turn push rod (counterclockwise to decrease temperature and clock-wise to increase
temperature) until indicating pointer tip reaches temperature that the setting point tip is set to, Items 5, 8 & 9.
5.
Tighten push rod set screw.
6.
Replace cover, knob, and cover screws.
61