TM 9-4520-257-12&P 0005 00
0005 00-24
NOTE
Make sure that the fuel can gravity feed adapter is
fully seated and secured to avoid leaking.
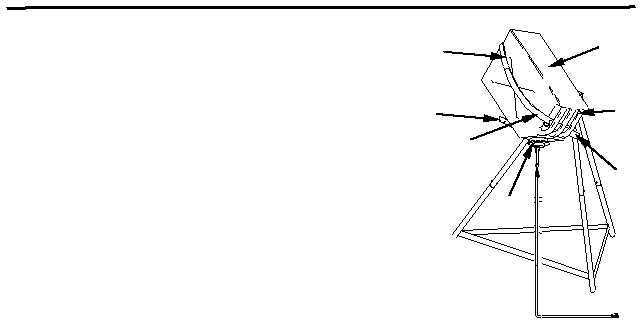
4. Invert the fuel can (9) with the installed gravity feed
adapter (10) and mount on the assembled fuel can stand
so that the gravity feed adapter (10) faces the ground.
Slide the fuel can handle (11) over the right support arm
(8) and allow the inverted fuel can to rest on the right and
left support arms (8,14). Wrap the left support strap (12)
over the bottom of the fuel can (9). Feed the right
support strap (13) through the fuel can handle (11), up
across the front of the fuel can body, and over the left
support strap (12). Secure the right strap (13) to the left
strap (12) using the hook and pile fastening.
NOTE
The strap is needed to secure a partially filled fuel can to the
fuel stand during windy conditions.
NOTE
If a fuel can stand is unavailable, invert the fuel can with the installed
gravity feed adapter on a stable support so that the opening of the fuel
can at the fuel site is 2 feet (60.96 cm) to 3 feet (91.44 cm) higher than
the height of the fuel flow control valve.
Starting The H-45 Type II (Liquid Fuel) Heater
NOTE
For best operation, be sure that the heater is as level as possible.
Inspect the burner, and drain any water that has collected on the bottom
of the burner assembly due to rain, snow, or moisture before lighting the
heater.
General.
1. If the fuel type is NOT known, refer to the section later in this work package entitled “Starting The H-
45 Type II (Liquid Fuel) Heater When The Fuel Type Is NOT Known.”
2. If the fuel type IS known, refer to the following section entitled “Starting The H-45 Type II (Liquid Fuel)
Heater When The Fuel Type IS Known.”
8
9
10
11
12
13
14


