T M 9 - 4 9 3 1 - 3 8 1 - 1 4 & P - 2
FRAME 8
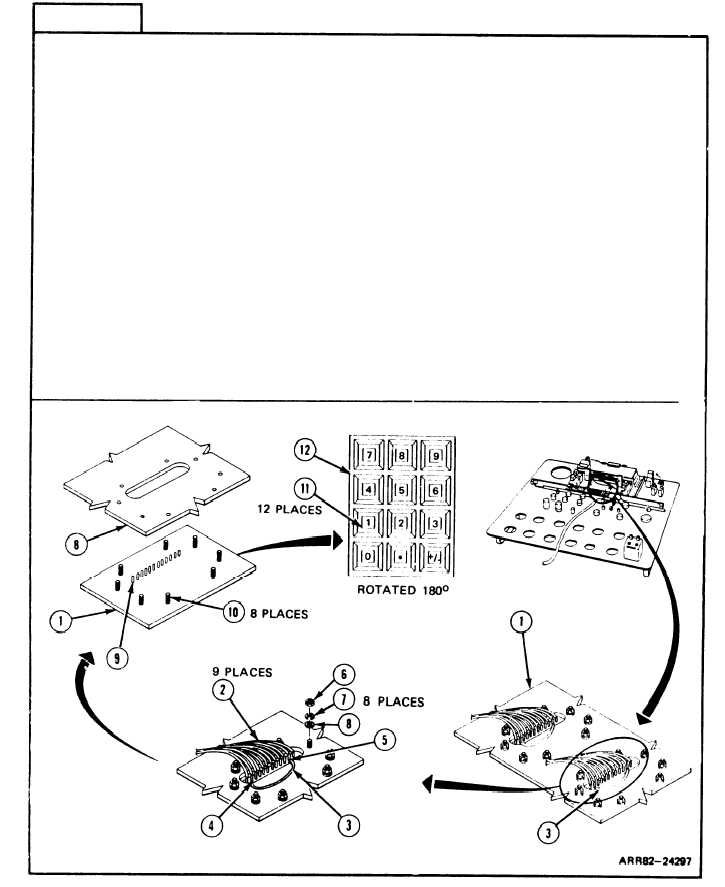
Remove Keyboard:
1.
2.
3.
4.
NOTE
l
Use this task to remove either function or numeric
keyboard assembly, numeric keyboard assembly (1) is
shown.
l
Read paragraph 2-4 on tagging and unsoldering wires
before doing any work.
Unsolder nine wires (2) and jumper wire (3) between H(4) and B(5) terminals.
Unscrew and take out eight hexagon plain nuts (6), Iockwashers (7), and flat washers
(8) with wrench. Get rid of Iockwashers (7).
Take keyboard (1) out of panel assembly (8).
Look at keyboard (1) for broken, bent, or missing terminals (9) and screw posts (10).
Look at keyboard (1) for cracked, unreadable, on missing inserts (11) or torn or worn
out rubber cover (12). If bad, turn in keyboard (1). If OK, set aside for later use.
Follow-on Maintenance:
NOTE: To install keyboard assembly, refer to task 24.
TASK 3 ENDS HERE
Volume IV
2-42
Para. 2-6, Task 3