TM 10-7310-241-12&P
Change 1 4-12.1
4-12.1 REPLACING THE COVER ASSEMBLY FOR MODEL 471012 (Continued)
INITIAL SETUP
Tools: Tool Kit, General Mechanics: Automotive (Appendix B, Section III, Item 1).
Parts/materials: Pressure Relief Valve, Dishwashing detergent, Small brush, Water, and Loctite 242.
HWR Condition: Power cable disconnected and power switch turned off.
CAUTION
To avoid possible damage to the lid hinge mechanism, do not attempt to
force the lid backwards from its normal open rest position, which is just
past the vertical. Ensure that the lid seals tightly against the HWR body by
adjusting the lid securing latches. Do not over tighten the latches.
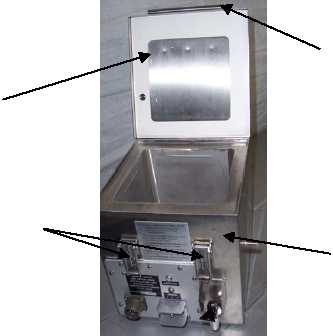
a. Removing the Lid. To remove the lid (cover) (1), rotate it upwards to its normal open rest position (just
past the vertical) and lift it from the HWR body (2).
b. Installing the Lid.
NOTE
When closing the lid, ensure that it is centrally located over the main
container.
(1) To install the lid (1) reverse the rotation of the lid and place it on the HWR body (2).
(2) The lid (1) is secured in the closed position using the two adjustable latches (3), which clamp onto the
curved front lip (4) of the lid.
1
2
3
4