
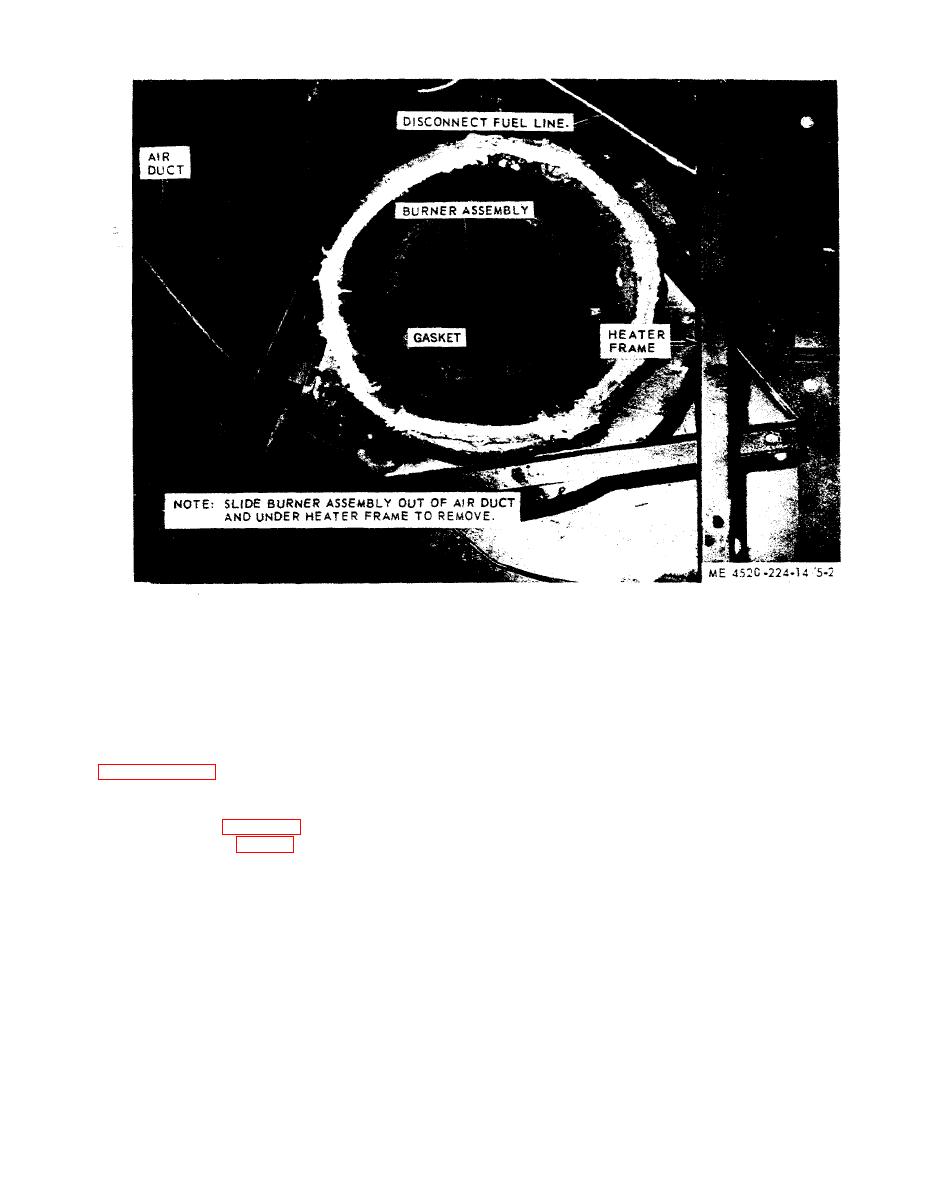
a. Removal.
control air distributor stud, which is attached to the
flame spreader assembly.
(8) Lift off the flame spreader assembly with the
(2) Remove the 3 bolts securing the burner
stud and remove the central air burner distributor.
(9) Remove the central air distributor ring and
traingular frame to the heater frame and remove the
the air distributor bottle from the flame spreader
burner assembly, figure 5-2.
assembly.
(1) Separate the gasket from the burner assem-
c. Inspection, Cleaning, and Repair.
bly.
(1) Check the cast-metal parts for breaks and
(2) Remove the burner overflow pipe by un-
cracks.
(2) Check the perforated sleeve for dirt and
(3) Remove fuel inlet elbow and nipple.
possible burns.
(4) Remove the nuts and lockwashers holding
(3) Inspect all parts for carbon deposits and
the burner triangle hanger to the burner air chamber
clean them thoroughly with a wire brush.
and separate the air chamber from the burner
(4) Inspect the overflow tubes for any ob-
assembly.
struction and clean them in solvent and blow
(5) Remove 3 thru bolts and nuts which hold the
through with compressed air.
burner bowl top retaining ring to the burner, and
(5) Straighten all dents and weld any breaks or
take off the ring.
cracks.
(6) Lift out the burner bowl perforated sleeve.
d. Assembly. Reverse the procedure in b. above.
(7) Remove the nuts, the lockwasher, the anchor
e. Installation. Reverse the procedure in a. above.
channel clip and the anchor channel from the burner
