TM 10-4520-262-12&P 0006 00
0006 00-9
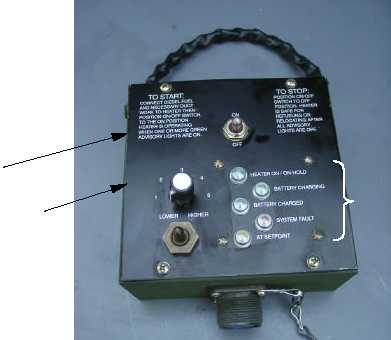
Place ON/OFF switch (1) on the in-tent controller assembly (2) in the OFF position or verify that it is in the
OFF position and wait until the all fans stop and all advisory lights (3) have gone off.
If the heater assembly was operating, allow the heater assembly to complete the post-purge mode and
ensure that all advisory lights on the in-tent controller assembly are off.
When the blower fans stop at the end of the post-purge mode, remove the fuel can (1) from the fuel can
stand assembly (2). Set the fuel can down in the upright position.
Place a petroleum absorbent material tray or mat under the heater fuel connector (3) to collect the small
amount of fuel that may drain from heater and the fuel hoses.
Remove the fuel hose quick disconnect (4) from the heater fuel connector (3) and lift the hose (5) above
the level of fuel can (1). This will allow all the fuel to drain back into the fuel can. Place the end of the
hose on the petroleum absorbent mat or tray.
Remove gravity feed adapter (6) from fuel can (1). Make sure all components of the fuel system are clean
and free of dirt and damage that could contaminate the fuel supply or cause leakage.
Obtain a fuel can full of the newly selected approved fuel. Remove fuel cap and install fuel can adapter
(6) onto fuel can (1). Tighten securely.
Attach fuel hose quick disconnect (4) to the heater fuel connector (3).
Place fuel can (1) onto fuel can stand assembly (2) and strap in place in accordance with tag attached to
stand assembly or the section of WP 0005 entitled “Assemble the Fuel Can Stand”.
Make sure fuel connections are tight and that there are no fuel leaks.
1
2
3


