
TM 10-4500-200-13
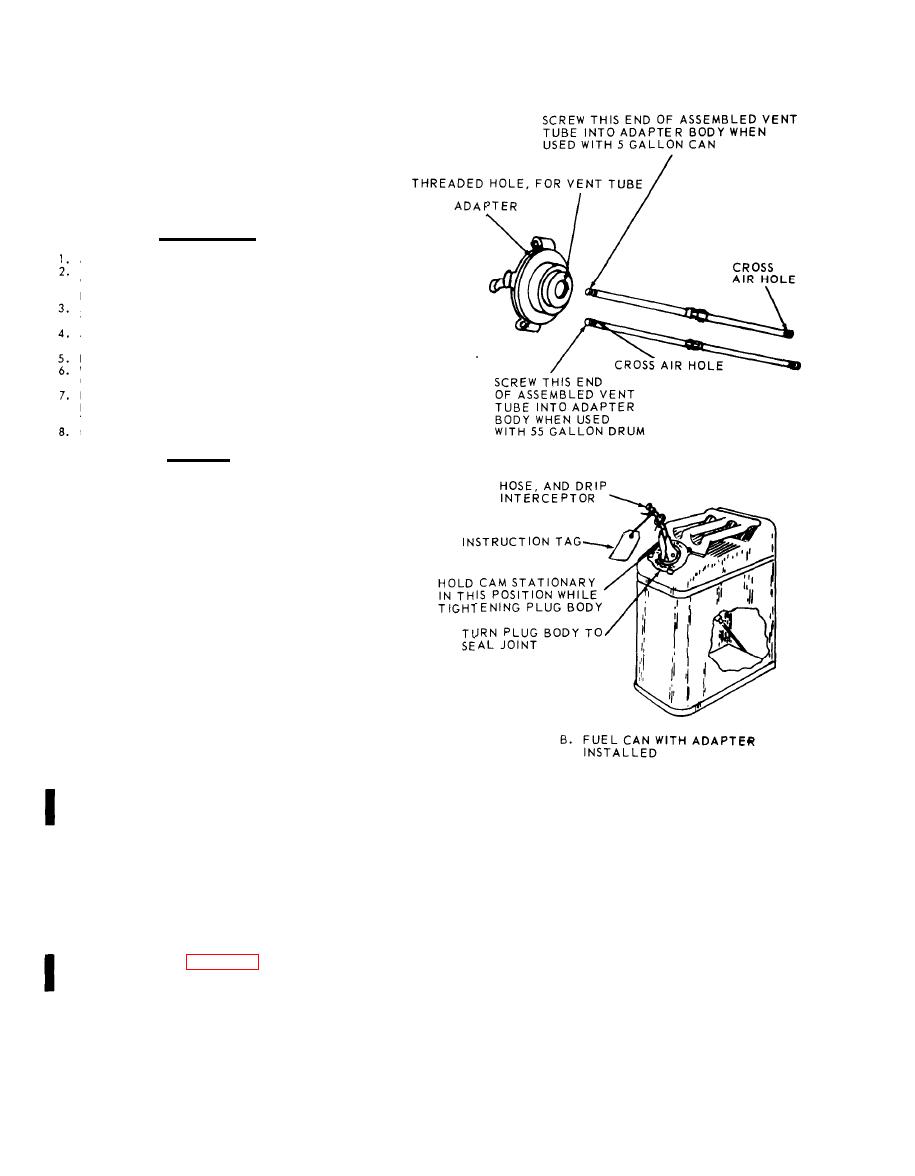
INSTRUCTIONS
ASSEMBLE THE TWO PIECES OF VENT TUBE AND TIGHTEN.
FOR 5 GAL. CAN. SCREW THE PLAIN END OF ASSEMBLED
VENT TUBE INTOADAPTER,WITH AIR HOLE AT E N D
FURTHEST FROM ADAPTER BODY.
FOR 55 GA L. DRUM, SCREW THE AIR HOLE END OF VENT
TUBE INTO ADAPTER BODY WITH PLAIN END OUT.
ASSEMBLE HOSE, GASOLINE, SCREW TYPE, TO ADAPTER
KIT, GRAVITY FEED, AND TIGHTEN.
RELEASE CAM AND HOLD CAM FREE IN VERTICAL POSITION.
WITH CAM IN FREE POSITION, TOWARDS CAN HANDLES,
INSERT ADAPTER IN CAN.
HOLD CAM IN FREE POSITION WITH ONE HAND TO PREVENT
ROTATION.
TURN PLUG BODY DOWN TIGHT TO PREVENT LEAKAGE.
PRESS CAM DOWN TOWARDS CAN HANDLES TO SEAL JOINTS.
CAUTION
A. VENT TUBE INSTALLATION
RELEASE CAM BEFORE REMOVING ADAPTER FROM CAN.
DO NOT PERMIT ADAPTER BODY TO TURN WHILE TURNING
PLUG BODY.
(Type II and Type I with Conversion Kit installed).
(d) Make sure that the inlet shutoff knob on the
The eliptical-hole shield is installed with both edges within
float valve is in the OFF position.
the tent.
(e) Invert the fuel can on a support no less than 1
(b) A pipe installation passing through the side of a
foot nor more than 8 feet above the float valve.
tent will require a shield having a round hole. The round-
d. Tent Space Heater Accessories.
hole shield is installed with one edge of the shield within the
(1) Refer to figure 2-4 and select the appropriate
tent, the opposite edge outside the tent.
accessories for the Type I and Type II heaters.
(c) Tuck the tent canvas into the raised edges on
(2) Installation of smoke pipe shields.
the shields to hold the shields securely in place.
(a) A smoke pipe installation passing through the
top of a tent will require a shield having an eliptical hole.
Change 14
