TM 9-2540-207-14&P
5.2.1
Vent Fan Assembly (continued)
Removal (continued)
Note: To release the small Logic connector J1 use a 1/8" flat blade screwdriver.
!CAUTION!
Ensure the edge of the screwdriver blade does NOT nick the connector wires while
unscrewing the connector.
4.
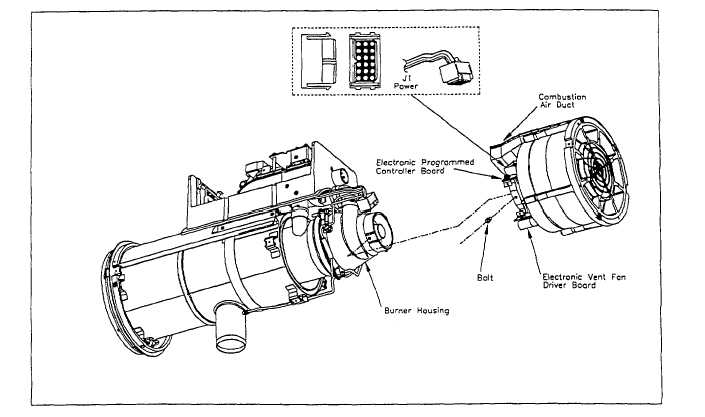
Disconnect Logic Wiring Harness connection J1 to the Electronic Programmed Controller Board.
Figure 5-2.3. Bolt Removal Detail, Vent Fan Assembly
5.
Use a 5/16" socket to remove the bolt which holds the Vent Fan to the Burner Housing.
!CAUTION!
Take care not to damage the Combustion Air Duct during Vent Fan removal.
6.
Gently pull the Vent Fan Assembly away from the Burner Housing Assembly.
7.
While holding the Vent Fan Assembly with one hand, remove the remaining Power Wiring Harness connector J1
from the Electronic Programmed Controller by squeezing with fingers and separating.
5-11