TM 9-2540-207-14&P
5.2.7
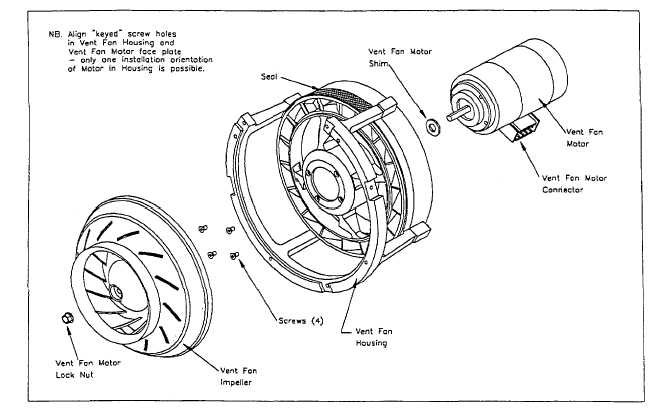
Vent Fan Motor (Continued)
Figure 5-2.15. Detail, Vent Fan Motor Orientation
Installation
Note: When REPLACING the Vent Fan Motor, a NEW Vent Fan Impeller MUST also
be installed (ref. 5.2.4). Impeller and Motor MUST be considered a 'matched set'.
Note: Inspect Driver Magnet for signs of scoring or rubbing. Replace if necessary.
Note: If the Driver Magnet is scored sufficiently as to require replacement, the
Burner Housing MUST also be replaced (ref. 5.3.7)
1.
Apply Loctite 242 (blue) to four (4) flat-head countersunk screws. Insert the Motor into the Vent Fan Housing,
and using a #1 cross-tip screwdriver, secure the Motor into the Housing with the screws. Note: It may be
necessary to rotate the motor until all 4 screw holes are aligned because the screw hole circle is 'keyed'.
2.
Install Vent Fan Impeller (ref. 5.2.4)
3.
Install Vent Fan Shroud (ref. 5.2.3)
4.
Install Electronic Programmed Controller & Vent Fan Driver Boards (ref. 5.5.5)
5.
Connect the Motor Harness (Connector J6) to the Vent Fan Driver Board ensuring the connector locking tabs are
properly engaged.
6.
Install Vent Fan Assembly to Heater (ref. 5.2.1)
5-25