TM 9-2540-207-14&P
5.3.3
IGNITER
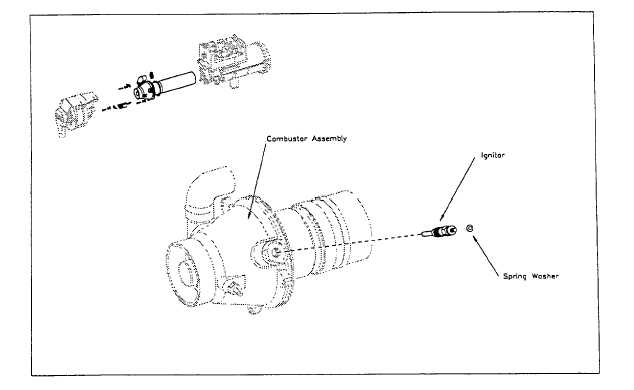
Figure 5-3.4. Igniter
Removal
1.
Remove Top Shell (ref. 5.1.2)
2.
Remove Bottom Shell (ref. 5.1.3)
3.
Remove Vent Fan Assembly (ref. 5.2.1)
4.
Remove Combustor Assembly (ref. 5.3.1)
5.
Using a 3/8" socket or wrench, remove Igniter threaded into the Igniter Holder
Installation
1.
If a NEW Igniter is to be installed:
i.
Remove Top Cover (ref 5.1.1)
ii.
Remove spare Igniter mounted in the Top Housing.
iii.
Remove the shipping nut on the electrical post of the Igniter, DO NOT remove the spring
washer.
iv.
Install Top Cover (ref. 5.1.1)
2.
Apply Nickel anti-seize (Loctite 77164) to the threads of the Igniter.
3.
Using a 3/8" socket, or open ended wrench, install the Igniter. DO NOT over tighten.
!CAUTION!
Be sure NOT to pinch or crush any wires when installing Igniter and/or Igniter
Holder.
4.
Install Combustor Assembly (ref. 5.3.1)
5.
Install Vent Fan Assembly (ref. 5.2.1)
6.
Install Bottom Shell (ref. 5.1.3)
7.
Install Top Shell (ref. 5.1.2)
5-31

