TM 9-2540-207-14&P
5.3.1
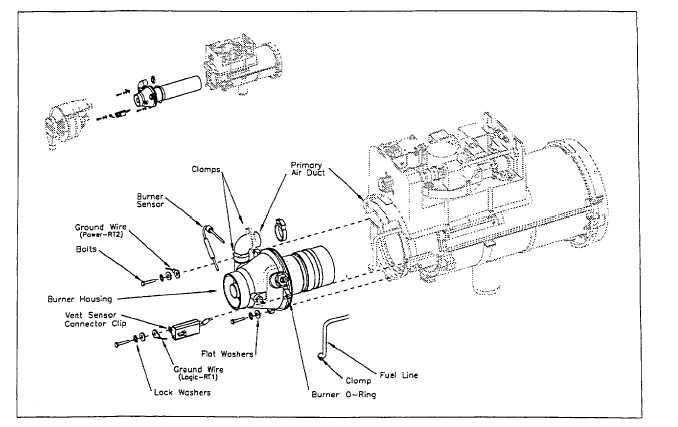
COMBUSTOR ASSEMBLY
Figure 5-3.2. Combustor Assembly
Removal
1.
Remove Top Shell (ref. 5.1.2)
2.
Remove Bottom Shell (ref. 5.1.3)
3.
Remove Vent Fan Assembly (ref. 5.2.1)
4.
Disconnect the Fuel Line connected to the Burner Housing by releasing the hose clamp and pulling the Fuel Line
straight off the fitting on the Burner. DO NOT REMOVE FUEL LINE FROM THE TOP HOUSING.
NOTE: If the fuel fitting on Top Housing is loose, Top Housing must be replaced.
5.
Remove Igniter Wire from Igniter Post.
6.
Using a 7/16" open ended wrench, disconnect the Burner Sensor from the Burner Housing by undoing the nut
from the fitting.
Note: The brass Burner Sensor and Fuel fittings are installed into the Burner
Housing with Loctite 609 and should NOT be removed.
7.
Remove the nylon clamp holding the Primary Air Duct to the Top Housing by disengaging the locking jaws.
8.
Using a 5/16" socket or nut driver, remove the three (3) hex-head bolts holding the Burner Housing to the Heat
Exchanger (including flat washers, lock washers, two (2) ground wires and Vent Sensor connector clip).
5-28


