TM 9-2540-207-14&P
5.4.1
HEAT EXCHANGER
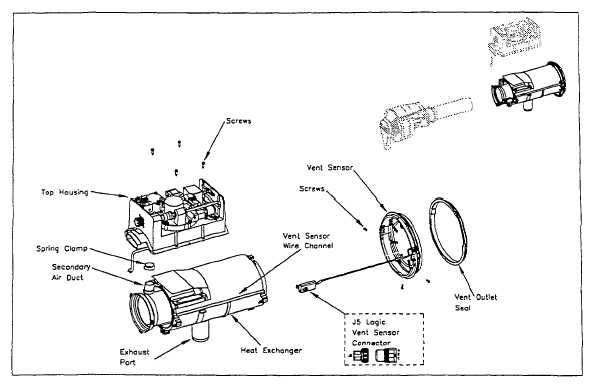
Figure 5-4.2. Heat Exchanger Assembly
Removal
Note: for steps 1-5, set the Heater on the Vent Sensor end. If fuel has collected in
the Heat Exchanger, it must be properly disposed of in accordance with the local
practices.
For steps 6-12, the Heater can be set with the Diagnostic Label facing downwards.
1.
Remove Top Cover (ref. 5.1.1)
2.
Remove Top Shell (ref. 5.1.2)
3.
Remove Bottom Shell (ref. 5.1.3)
4.
Remove Vent Fan Assembly (ref. 5.2.1)
5.
Remove Combustor Assembly (ref. 5.3.1)
6.
Remove Flame Tube (ref. 5.3.2)
7.
Using pliers, release the 1" metal spring clamp at the Secondary Air Duct from the Heat Exchanger End. Slide
the spring clamp over the hose and release onto the Top Housing end so that Secondary Air Duct and two spring
clamps are attached to Top Housing.
8.
Disconnect the Vent Sensor connector (J5).
Note: The Vent Sensor connector has a self locking tab that needs to be lifted to
allow the two halves of the connector to come apart.
5-44


